“"Blocked" WordPress Theme” Documentation by “Anps” v1.0
“"Blocked" WordPress Theme”
Created: 14/09/2012
By: Anps team
Email: Anps
Hello! First of all I would like to thank you for purchasing our theme! :)
If you have any questions that are beyond the scope of this help file, please feel free to send your question on support@anpsthemes.com.
This file will teach you how to set up and use the “"Blocked"” WordPress Theme.
This file is really extensive so you might think the theme is hard to use,
actually its not, you probably just might jump to the options page and explore everything yourself, this file is more of a reference work if you do not know what to do, or if you are not familiar to WordPress.
Have fun! best regards
Anps team
Table of Contents
Folder Structure - top
The Theme is built with WordPress best practices in mind, therefore it makes heavy use of the WordPress template engine. What exactly does that mean?
Whenever you see a php function call like this within your php files (get_template_part(), get_header(), get_footer() or get_sidebar() ) the theme retrieves a reusable code snippet, most of the time a chunk of code that is used in many different files.
- This approach has the benefit that you can edit a single code snippet and the changes will effect many page templates
- Its still easy to only change a single page template since you can simply include a modified copy of the snippet instead of the original one
- Last but not least it makes the folder structure clear and tidy
Apart from the php structure the theme uses a lot of modern CSS3 features, most notably the power of media queries to serve different layouts for different viewport sizes. If you use a modern browser (IE9 +, Chrome, Safari, Firefox) and resize your browser window you will realize that the theme adapts its size to the viewport. The site works also IE older browsers like IE8, but lacks some animations and usage of CSS3.
Folder structure:
- Blocked → main folder of our theme, which includes all of our main PHP, CSS and JS files
- js → Custom Javascript files, gmap3, jQuery Easing, Lightbox
- css → Multiple stylesheets:
- style.css: theme main CSS file, which includes almost all classes
- media-queries.css - media queries for smaller screen estates
- color/css/ folder - here you will find 12 CSS files, which are used for our 12 preset theme styles
- css/ie.css - fixes for IE
- css/lightbox.css - CSS for the Lightbox plugin
- shortcodes - our shortcode system
- mailer - PHP files used for sending form information
- admin-functions - backend files for our theme
Installation - top
You can either choose to upload the theme to your server via ftp (only upload the unzipped folder "Blocked" into the folder wp-content/themes/ ) or via WordPress upload function. to use the upload function of the WordPress admin panel make sure to ONLY upload the "Blocked" folder and not the whole archive file that you received from themeforest.
Notice: if you are new to WordPress and have problems installing it you might want to check out this link: Solving broken theme issues
After that is done activate the theme as you would activate any other theme at Appearance→Themes.
If you are new to WordPress and have problems with setting up the theme you might want to import the dummy content file that comes with the theme. You can import this file by clicking the "Insert dummy content" Button in the Appearance → Blocked options → Dummy content. The theme will then import some dummy posts and pages from the live preview. However you will still need to set some options on your own, like which page should serve as front page or how menus should be displayed.
Setting up the Blocked Options - top
The main theme options can be found under the Appearance tab → Blocked options and are arranged in submenus:
- Theme style
- Theme options
- Contact info
- Translate
- First page blocks
- Dummy content
- Slider options
All of the above submenus are described separately in more detail below.
Theme style - top
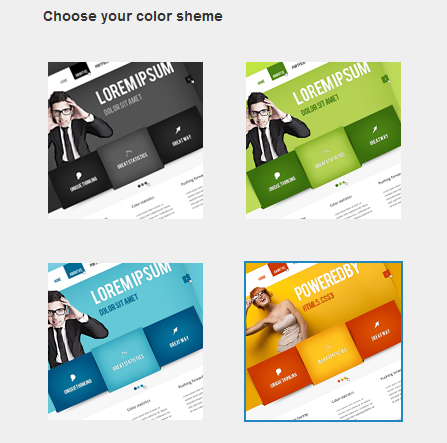
Blocked theme uses a unique design, which uses many shadows, lights, gradients etc. Because of the complexity of the theme we decided not to add a color picker, but to predefine 12 carefully chosen theme styles.
Tab Theme style is used to select one of the theme style. You can choose 4 colors orange, blue, green and black, but all of these colors have 3 variations normal, light and grey. The selected theme style is shown by a blue border.
Theme options - top
Under tab Theme options you will find social accounts, contact information, favicon and logo, page setup.
 Responsive
Here you can turn on/off responsive option for template. That means if responsive option is turned off template won't adjust to other devices (mobile, tablets etc.). Responsive option is turn on by default.
 Email
Email
Enter your email address here. All contact form messages will be sent on this email address.
 Google Analytics Tracking Code
Enter your Google analytics tracking Code here. It will automatically be added to the themes header so google can track your visitors behaviour.
Social Media Inputs
Here you can add all of your social media accounts (Facebook, Twitter, LinkedIn, Vimeo, YouTube and Flickr), which are then going to be shown in the page footer. You do not need to add
all of the mentioned accounts, because the size of the social media bar will change depending on the number of chosen accounts.
Important: The twitter account you define in here will show in the footer of the page and also in the sidebar. Example how to set twitter account: https://twitter.com/AstudioTweet.

 Contact information
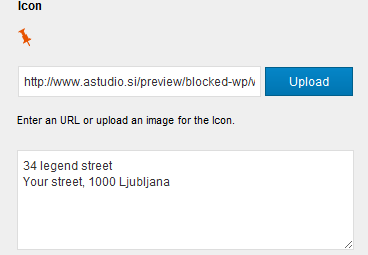
You can display your contact information anywhere on the site, even in your footer using shortcodes (click here for more info on shortcodes). Enter an URL or upload a image for the icon and enter text here. There are 3 options for address, phone and website.
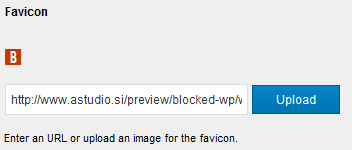 Favicon
You can choose to upload your own favicon. You will also see preview image. Favicon dimesions have to be 16 x 16px. Image type can be .gif, .png or .ico.
![]() Logo
Logo
Next you can choose to upload your own logo. Make sure that the logo has the correct dimensions (190x54px). If you need to embed a logo of different size you might need to edit the CSS files directly.
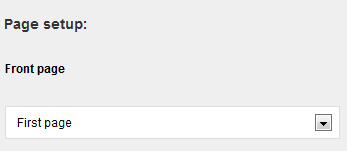 Front page & Blog page
First of all you have to choose which content your front page should contain. You can either choose to display a page of your choice, or if you dont select a page the blog will be displayed. If you choose to select a page you can then pick another page that will display your blog instead of the default page content. If you want to make the front page look like the one in the theme demo make sure you select a page.
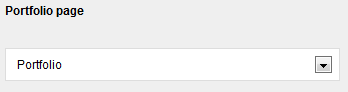 Portfolio page
Here you can choose which content your portfolio page should contain. Portfolio page has several options (pagination type, limit items and portfolio heading), which we will discuss now one by one.
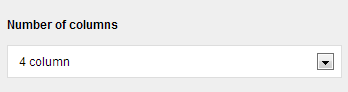 Number of columns
You can choose between 2 columns, 3 columns and 4 columns layout.
 Limit items per page
Enter a number for the maximum number of items to shows on each portfolio page. This value must be divisible by the number of columns for example:
- 2 column layout can have a limit of 2, 4, 6, 8, 10, 12 etc. items
- 3 column layout can have a limit of 3, 6, 9, 12, 15, 18, 21 etc. items
- 4 column layout can have a limit of 4, 8, 12, 16, 20, 24 etc. items
 Portfolio heading
Enter your portfolio heading here. Default value is 'Take a look at my awesome projects'.
Contact form - top
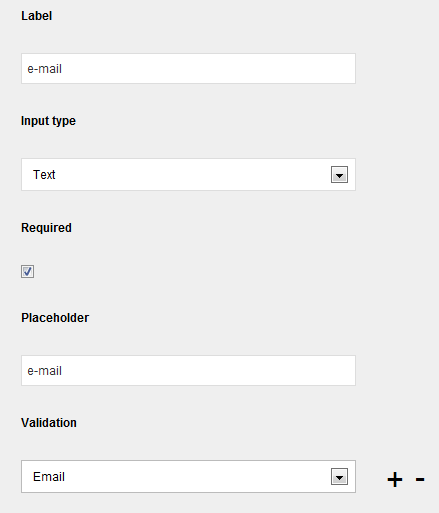
From this tab you can easily create any kind of contact form you like. For each box you have 5 set of settings:
- Label: Label is used for the box information like E-mail:, Write your phone number etc.
- Input type: Here you can select two values: text and textarea.
- Required: If you check this field, then the user will have to write some information inside.
- Placeholder: This is the text that is shown inside of the box and disappeares when the user click on the box.
- Validation: This is the validation type and you can choose None, Email and Phone Number.
You can add or delete fields by either clicking on the plus or the minus sign on the right side of each field. The new field will be added behind the field you clicked on.
Contact form is installed by default and contains five predefined input fields (e-mail, subject, contact number, lorem ipsum and message).
Translate - top
In the development of our theme we used some expression that can be changed here.
First page blocks - top
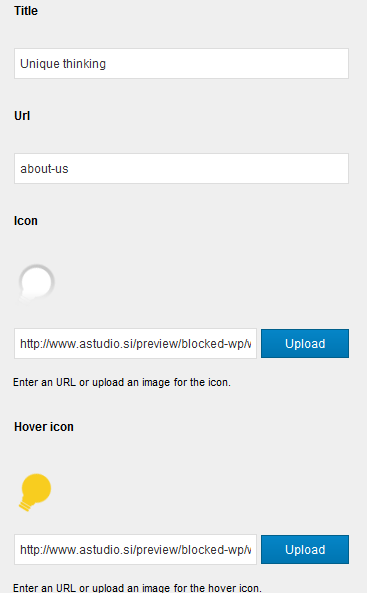
Here you can enter data for the three boxes that are located on your front page - they only appear on the page you have set for you home/front page and can't appear anywhere else.
Important: The maximum size of your icons must not exceed 50px / 50px, but can be less than that, because they will be centered accordingly.
For each of the blocks you can enter title, URL, icon and hover icon.
For icons and hover icons you can either enter the URL or upload an image via the uploader. Please make sure the icon and the hover icon are the same size so you won't have any problems.
Dummy content - top
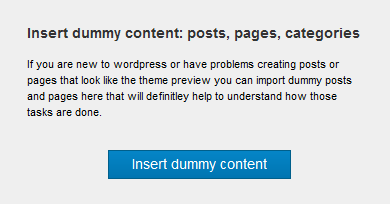
If you are new to WordPress or have problems creating posts or pages that look like the theme preview you can import dummy posts and pages here that will definitely help to understand how those tasks are done.
Important: Please make sure you have set your links to pretty link, so you won't receive any errors, check also menu description below.
Important: If you are having trouble inserting dummy content and are receiving server errors, you will probably need to set your file permissions on folder wp-content/uploads ( if you don't have the folder, create it manually and set the permissions only on this folder ).
If you don't want to set, can't or don't know how to set file permissions, you can download this .zip file and place it into wp-content folder.
Menu - top

When creating your menu you should keep in mind that our theme supports space for only a number of fields, so be careful. The theme support only up to three level menu structure.
Also when you add dummy content don't forget to choose which main menu should be selected. To choose your main main go to Appearance → Menus and then select a menu for your Primary navigation.
Slider options - top
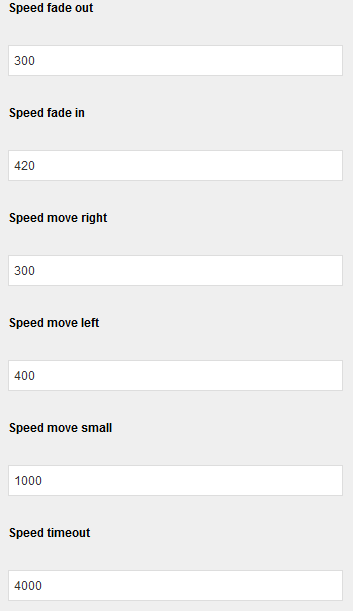
Here you can set how fast the slider is going to perform the animations. All speeds are in milliseconds, so 1 second is equal to 1000 milliseconds. You can set:
- Speed fade out - this is the speed of image fading out. The default value is 300.
- Speed fade in - this is the speed of image fading in. The default value is 420.
- Speed move right - this is the speed of the text beside the images sliding right. The default value 300.
- Speed move left - this is the speed of the text beside the images sliding left. The default value 1000.
- Speed move small - this is the speed of the text only slider. The default value 400.
- Speed timeout - this is how long the slider is going to take to automatically move to the next slide. The default value is 4000.
Adding a sidebar to pages - top
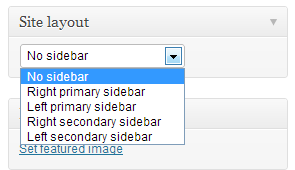
You can add a sidebar to all pages, but the portfolio pages and single item portfolio page. You add a sidebar to a page by selecting the desired Site layout in the sidebar of Edit page/Add page page. You can choose from No sidebar (default), Left primary sidebar, Right primary sidebar, Left secondary sidebar and Right secondary sidebar.
With the secondary sidebar you can have two totally different sidebars on your site. It is really useful when you want to only add the secondary menu and no other widgets.
You can also add our widget Sidebar menu to the sidebar, which will allow you to create a secondary navigation.
Important: You can't use the services slider in a page with a sidebar.
Slider - top
This theme consists of two slider: a media with text slider and a text only slider. You can set the slider for each page/post individually, just below the main content editor.
Media with text slider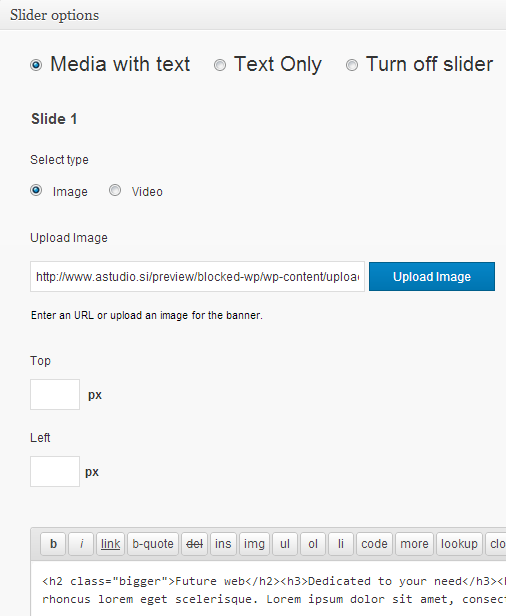
To select the slider with media and text make sure you check the Media with text radio button.
Then you have to choose if you want to add an image or a video to your slider, by either checking the Image or Video radio button.
The last thing to add to a slider is the main text. Repeat all steps for the other two slides.
If you want to add a static image besides the text (example), you need to add the image same image to all of the sliders.
Important: Be sure that your images are sized properly - ideal 500 x 550 px. But if you want to position each slide image differently we added class generator, so you can style them by calling "page_name""slider_number", for example "blog1".
Text only sliderWhen you change the radio button to Text Only you will only get three editor for each of the slides. We do not recommend adding anything other then header elements ( h1, h2,.., h5 ).
Static sliderYou can turn both Media with text slider and Text only slider into a static slider ( removes slider controls and which allows you to display only one slide ). To include a Static slider just fill in the content for one slide and it will automatically turn it into a Static slider.
Turn off sliderTo turn off slider for a page or post, just simply select the Turn off slider radio button.
Adding Blog items - top
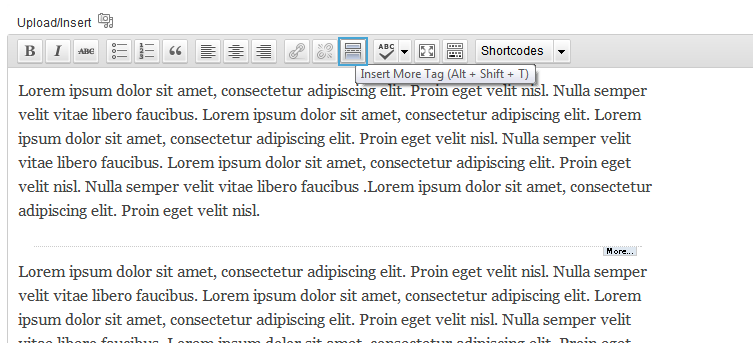
To add a post to your blog click on Posts → Add New, then add post heading, post content, add Featured image and select the blog category. All of those settings are standard for WordPress, but you need to do one more thing before you can submit your post. You also need to add Insert More Tag to separate your post summary and the full content of your post. Text above the More line will appear on the Blog page, while the rest of the text will appear only on your article page.
Adding Portfolio items - top
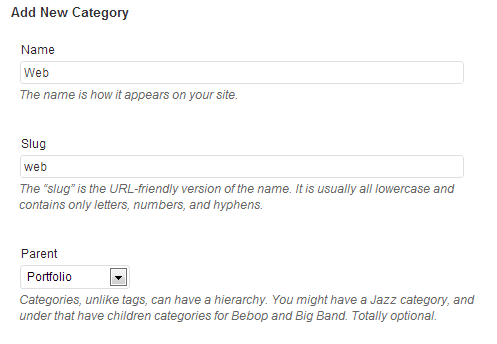
Set up filter categories:
Go to Posts → Categories and add a subcategory to Portfolio by selecting Portoflio as the parent, like shown below:
Adding portfolio items is the same as adding a Blog item:
- Add Post name, Post content ( separate the main content and the post summary with the More Tag and make sure the summary is short ), set up slider options and select the portfolio category ( is you are setting up the filter you also need to select a subcategory )
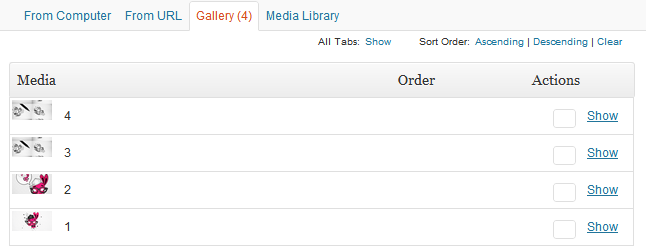
- When adding a Featured image you can also add up to 3 images besides the Featured image to show on the portfolio single page by just adding them besides the Featured image
Services - top
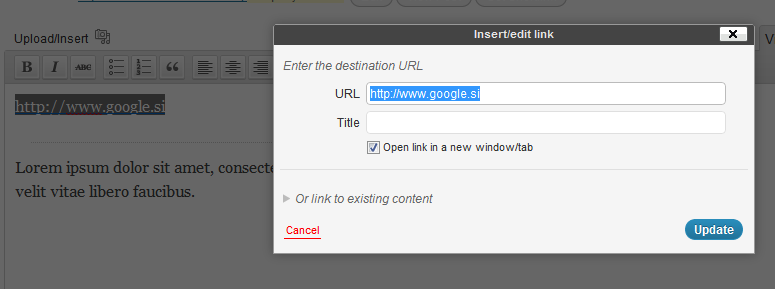
As adding blog and portfolio items, go to the Add New Post page and start by adding the Insert More Tag and above it write the url, select it and click the Insert/edit link button, leave the url the same as in the content editor and check Open link in a new window/tab. The example below is shown for adding a link to http://www.google.si.
Below the More tag write the short description, then select your services category and add 2 images from the Set featured image. The one not selected as the featured one will appear when you will hover over the featured image.
Widgets - top
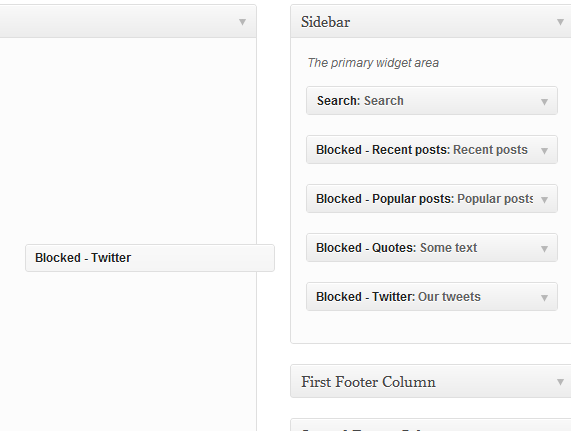
We included 5 custom widgets: Recent posts, Popular posts, Quotes, Twitter and Sidebar menu. We also styled the default ones to some extent.
You can add widget in Appearance → Widgets by drag and dropping in the Sidebar box.
Once you have added a widget to the Sidebar box the widget will open and extra fields will appear.
Sidebar menu widget
You can add a secodary menu to your site, by adding our Sidebar menu widget. First you will only have 2 options: Title and Link category. The link category is the category
from which all your links will be displayed. If you don't know how to set up links in Wordpress, see our below tutorial Adding links to footer which covers it.
Once you have the Title and Link category, click save and you will be able to add pages on which your sidebar menu will appear.
Footer - top
We included the footer styler in the same part as Widgets, Appearance → Widgets. The only difference is you don't drag and drop in the Sidebar box, but you add them in 4 different columns. In each column you can add what you like, but we recommend to text, link, search and contact info shortcode.
Adding links to footerFirst thing you will need to do is go to Links → Link Categories where you set categories for all your different types of links. Once you have done that you go to Links → Add New and add your links, but don't forget to choose the categories of links you have previously declared.
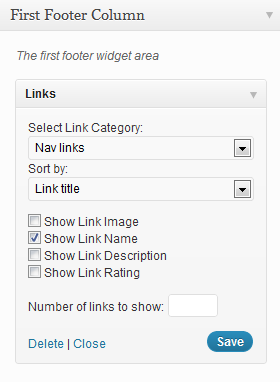
Now you are ready to start showing the added links in your footer, just find the Links widget and add it to the desired Footer Column.
When the widgets open you will be able to set from which link category should links be displayed and how to sort them ( Link title, Link rating, Link ID, Random ).
Because of the aesthetics of our theme, we only added supports for text only links so only check the Show Link name checkbox.
Last thing before clicking save, you need to set the number of links to be shown.
Shortcodes - top
Shortcodes are small text snippets that get converted by WordPress. As an example:
Using shortcodes is very easy. To use one, create a new post (or edit an existing one), and in the the editor type a shortcode in brackets, such as:
[quote] This is a pull-quote. [/quote]
The theme comes with quite a few shortcodes that are easily accessible thanks to a visual self-explanatory user interface that is accessible by clicking the Shortcodes button when you write a post or a page. Most shortcodes require you to enter additional information and then get generated by the theme on its own. You can also choose to nest various shortcodes.
Attention: Please make sure to always start new shortcodes on new lines. Most of the time you wont encounter any errors if you don't do that but unfortunately WordPress does mess up the HTML sometimes.
Check all of the shortcodes in action
HTML Structure - top
The Theme uses valid HTML 5 and comes with predefined classes for common elements needed in web design.
All templates share basic elements like header, footer, main, and entry so be carefull when editing those or adding/changing the CSS.
CSS Files and Structure - top
The CSS for the theme is split into various files: theme main CSS file ( style.css ), which includes almost all classes, CSS file for responsive design ( media-queries.css ), 12 CSS files, which are used for our 12 preset theme styles ( folder color/css/ ). Last but not least we got an empty custom.css file which should be used by you to add your own modifications. Since we never touch the custom.css file when making updates you can easily update to later theme versions without beeing in danger of loosing stylesheet modifications.
JavaScript - top
The theme uses advanced jQuery functions. You do not need to know how to use jQuery to activate them, almost everything is controlled by WordPress. All the function calls as well as as the custom created jQuery plugins like the slideshows are located in the js/functions.js file.
Lightbox v2
We used Lightbox only on the portfolio page, but if you want to apply the lightbox to a link you can add the rel='lightbox' attribute to the <a> tag.
PSD Files - top
Among with the theme come all psd files needed to edit the different skins. With these psds you can even create your own unique "Blocked" skin.
Image Sizes- top
This are all the image size that have been set or updated in functions.php to tell wordpress which image sizes to use. The preview images for dynamic templates at the bottom can be delted if you dont want to use dynamic template files of that size.
- thumbnail width: 275 x 135px
- blog: 586 x ( depending on image ) px
- portfolio: 649 x 543 px
- portfolio thumbnail: 150 x 1353 px