
This post goes through the process of publishing and developing an NPM package. The post is a great starting point for developers who have some experience in Node.js, but have not had a chance to publish their own Node module to NPM. We also go explain how to use built-in array methods, which greatly simplified our module code.
Introduction to our module
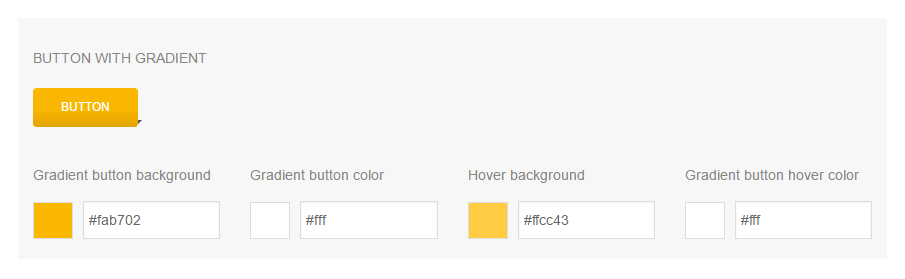
Options for the gradient button
In our WordPress themes, we provide options where users can change the look of the theme (eg. text color, text size, font family). We add inline styling and use PHP to retrieve the dynamic styling values from the database. Example:
/* Gradient Button Color */
.btn-gradient {
   color: <?php echo get_option('anps_gradient_button_color', '#fff'); ?>;
}
In the past we searched for a specific option value in our CSS files (eg. #777 for text color) and extracted the selectors from the file. As we did this by hand, we pushed this task aside and worked on it as one of the last things on our TODO list. During the process, mistakes were made, time was lost and motivation for finishing the theme was gone.
We decided to build a NPM task to help us extract the properties we needed. We also created Gulp and Grunt plugins for the module, so we could easily include the module in our workflow.
First steps
When creating a new Node.js package, the best way is to start with the package.json file. Once your package.json file is created, you’ll need to create the file that will be loaded when the module is required – index.js.
Creating package.json
package.json is a settings file for your NPM package and contains the name, version, dependencies, etc. of your package. The file is usually located in the root of the project.
The most important settings are name and version. These 2 settings are required and your package won’t install without them. The name and version together form an identifier that is assumed to be completely unique.
You will also want to provide a value for main. This refers to the primary entry point for your program. This is usually index.js and for most modules.
Use the npm init command to create a new project.json file. This will open a utility that will walk you through the process and will cover only the most common settings.
Basic package.json example:
{
   "name": "project-foo",
   "version": "1.0.0",
   "description": "This is just an example project.",
   "main": "index.js",
   "author": "anpsthemes",
   "license": "MIT"
}
Take a look at the online documentation or run npm help json to get additional information.
Creating index.js
An NPM module is just an ordinary JavaScript file with the addition that it must follow the CommonJS module spec.
Each NPM module runs inside its own scope, so that it does not conflict with other modules. require and exports functions are available to you just for this reason. Using require you are able to use other modules and by using exports you make your module available to other modules. A basic module:
/* Getting access to another module */
var foo = require('foo');

/* Making our code available for other modules to use */
module.exports = function() {
   /* Your module code */
 }
Building our module
The main logic for each module is different. For building our module, we utilized the built-in Array.prototype.filter() and Array.prototype.map() array methods, that greatly simplified our code. If you have not used filter or map methods before, make sure to give them a try.
Array.prototype.filter()
This array method creates a new array with all the elements that pass the test in the function that is provided as the first parameter.
Example below shows how to get front-end developers from the array:
var employees = [
  { name: 'Dusko', title: 'Designer' },
  { name: 'Bostjan', title: 'Back-end developer' },
  { name: 'Andrej', title: 'Front-end developer' },
  { name: 'Ziga', title: 'Front-end developer' }
];

var frontEndDevs = employees.filter(employee => employee.title === 'Front-end developer');
// Filtered array [{ name: 'Andrej', title: 'Front-end developer' }, { name: 'Ziga', title: 'Front-end developer' }];
Array.prototype.map()
It creates a new array with the results of calling the function that is provided as the first parameter, for every array element.
Example of getting only a specific property of an object:
var employees = [
  { name: 'Dusko', title: 'Designer' },
  { name: 'Bostjan', title: 'Back-end developer' },
  { name: 'Andrej', title: 'Front-end developer' },
  { name: 'Ziga', title: 'Front-end developer' }
];

var jobTitles = employees.map(employee => employee.title);
// ['Designer', 'Back-end developer', 'Front-end developer', 'Front-end developer']
Chaining map and filter
Combining these two methods together, allows us to write pretty complex programs, all without a single loop.
Below is an array of themes, with names and their price. Imagine that this array was much larger and that you had to get the names of themes, which price is larger than or equal to 49$. Using both map and filter is ideal for such a task:
var themes = [
   { name: 'Kataleya HTML', price: 15 },
   { name: 'Altus HTML', price: 17 },
   { name: 'Juicy', price: 49 },
   { name: 'Transport', price: 59 },
   { name: 'Pen', price: 44 }
];

var filteredThemes = themes.filter(theme => theme.price >=49).map(theme => theme.name);
// ['Juicy', 'Transport']
The above code first filters out all the themes that have the price larger than or equal to 49$, then using the map function we only get the names of those themes.
Similar chaining was used for the module logic of filtering out rules that only have the properties we are looking for.
Transpilation
You may decide using ES6 (ECMAScript 2015) features to make your code more readable. When we first started building our module, we thought as Node supports ES6 features, a transpilation process would not be required. We looked around at existing packages on NPM and most of them use a transpilation process. They follow a common pattern of providing an ES6 version in the /src/ folder (used for NPM) and an ES5 version in the /lib/ folder (used for development and available on GitHub).
We decided to use Babel as our ES6 transpiler. Babel is used by many open-source projects on GitHub (including React.js) and has an awesome community behind it. You can try out Babel on their site and experiment to see how it converts ES6 code to ES5.
Installing Babel
While you can install Babel CLI (core Babel tool) globally, Babel recommends you install it locally project by project. Besides the Babel CLI, you also need to install a preset. In our case this meant a preset for all ES6 plugins. Install it by running:
npm install babel-cli babel-preset-es2015 --save-dev
Take a look at the official documentation for more information.
Running Babel
You can trigger the compile process without any custom task, but each time you would have to type the entire Babel command. We can make this process much easier by creating a custom command in our package.json:
"scripts": {
  "build": "babel src --presets babel-preset-es2015 --out-dir lib",
},
Now we can compile the code by running npm run build in the terminal.
We can also add a prepublish command, so the compilation happens automatically each time you upload to NPM:
"scripts": {
   "build": "babel src --presets babel-preset-es2015 --out-dir lib",
   "prepublish": "npm run build",
},
Ignoring files
The project structure we used allows us to have the ES6 version available only on GitHub, as it is used only for development. We ignore the node_module folder, so we don’t pollute our project with other node modules.
The ES5 version is only available on NPM and is generated during the publishing process.
Our files:
.npmignore
/src/
.gitignore
/lib/
/node_modules/
Publishing the package
You will need to have an account on NPM in order to publish packages. If you don’t have an account, create it with npm adduser (or register on the site). If you already have an account, use npm login. Use npm config ls to see all the login credentials that are stored on your computer.
Once logged in, use npm publish to publish your package. To see your new package, go to https://npmjs.com/package/<package>.
Note that everything in the directory will be included in the package, unless it is ignored inside .gitignore or .npmingnore files.
Updating the package
After making the necessary changes in your code, you will need to change the version number. You cannot update your package, without changing the version.
You can change the version by hand in package.json or you can run npm run <update_type> (patch, minor, or major).
After updating the version number, publish your changes by using npm publish again.
Further work
We realize our module is not a perfect solution and still requires some manual work:
- the same value can be found in multiple options,
- you can only combine the selectors, but cannot provide the PHP code, as you don’t know the option name.
We plan to release a SASS version of the above module, where SASS variables can be used to solve both issues.
Check our module
Our project is available on:
NPM
GitHub
If you find any bugs or would like to add some additional functionality, feel free to open an issue on GitHub.