Sliders are the front line of our website and creating them can sometimes be a painstaking job, especially with all the mobile devices out there.
We took some time to create a short tutorial how to tackle this issue and create a simple slider which will work well across all devices. At the end of this post, you will find a free .zip file for download which you can import into your Revolution Slider.
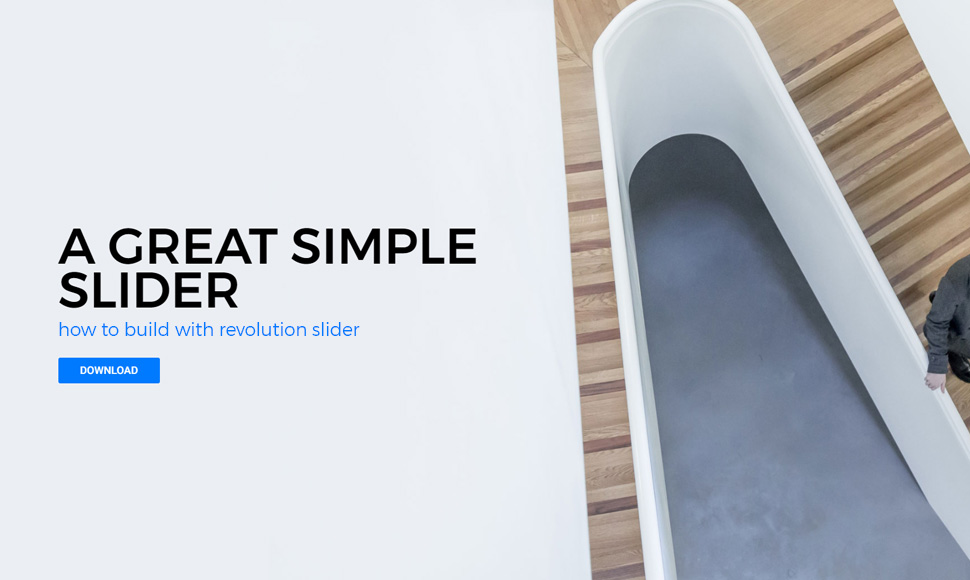
As you figured out from the previous sentence, we will be using Revolution Slider which is the number one choice for our products and we will be building the demo slider on our Accounting WordPress Theme. You can see it live here.
Installing The Slider
Accounting already includes this great slider, so installing it will be automatically prompted as soon you activate our theme.
If you are installing it, as a stand-alone plugin, then here is a great tutorial on installing the plugin itself.
Selecting Your Assets
First, you will have to do some research on what kind of slider you want to create and for that, you will need to find those perfect images and typography.
Luckily Revolution Slider supports the Google Fonts. You also have plenty of free and premium photo services out there.
Here are some free that you can use:
Getting Started
For this tutorial we decided to go ahead and build a full-screen slider.
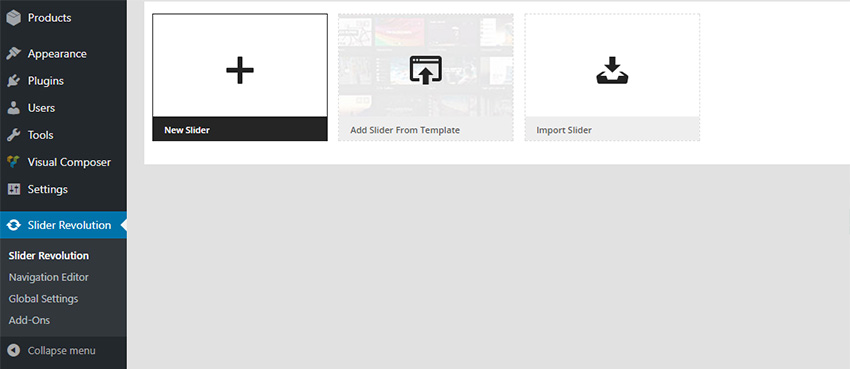
So first step is to navigate to the Revolution Slider settings area. You can find it in the left menu near the bottom of your WordPress admin dashboard. Click on “New Slider” to create your new slider.
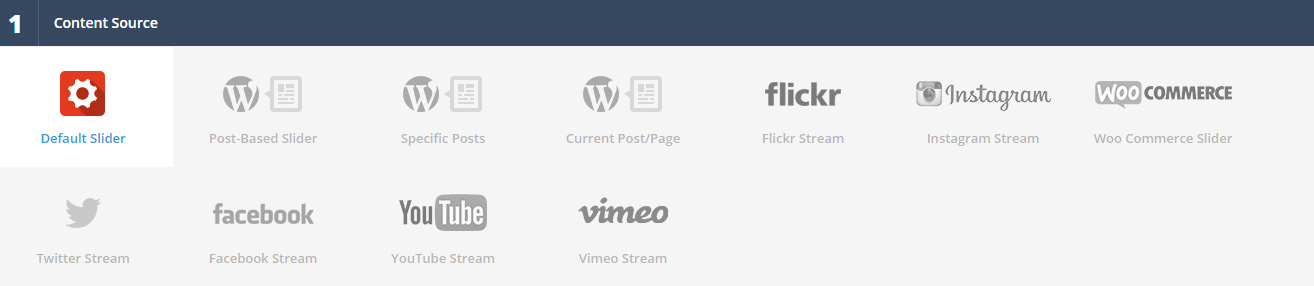
After you create your slider you will have to set some general settings.
- Select the slider Content Source to Default Slider
- Name your slider (eg. Main slider) and don’t forget to input the alias (eg. main-slider)
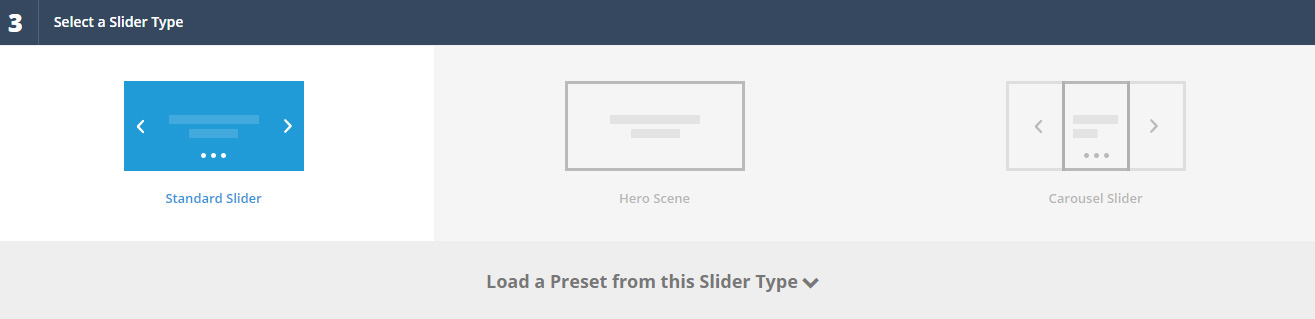
- Select a Slider Type as Standard Slider
- For Slider Layout, in this case, select Full-Screen
Everything else you can leave as default.
After you click save, you will be redirected to the Slide Editor.


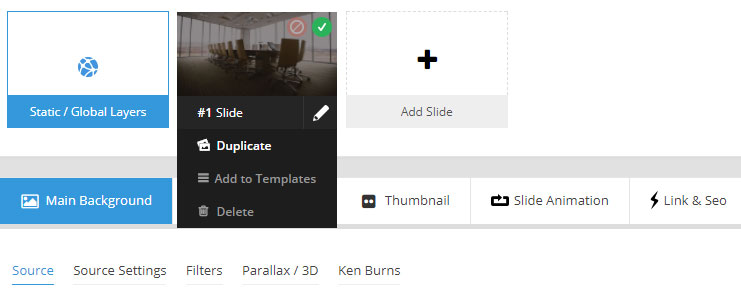
Creating The Slide
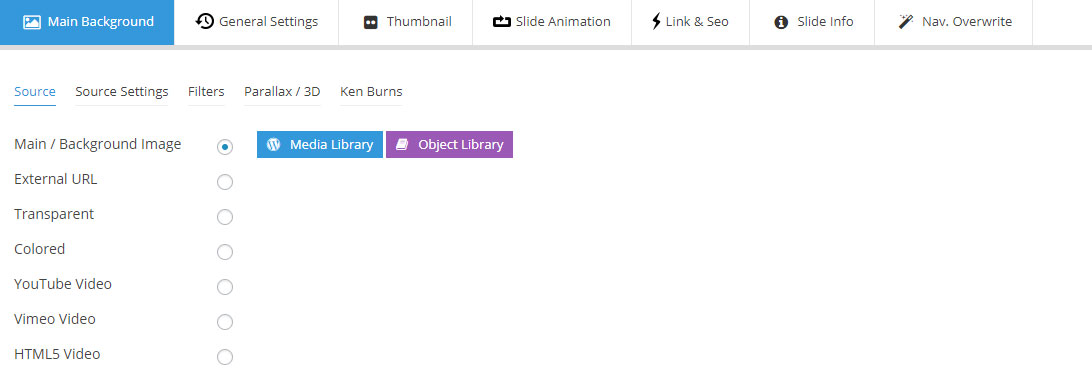
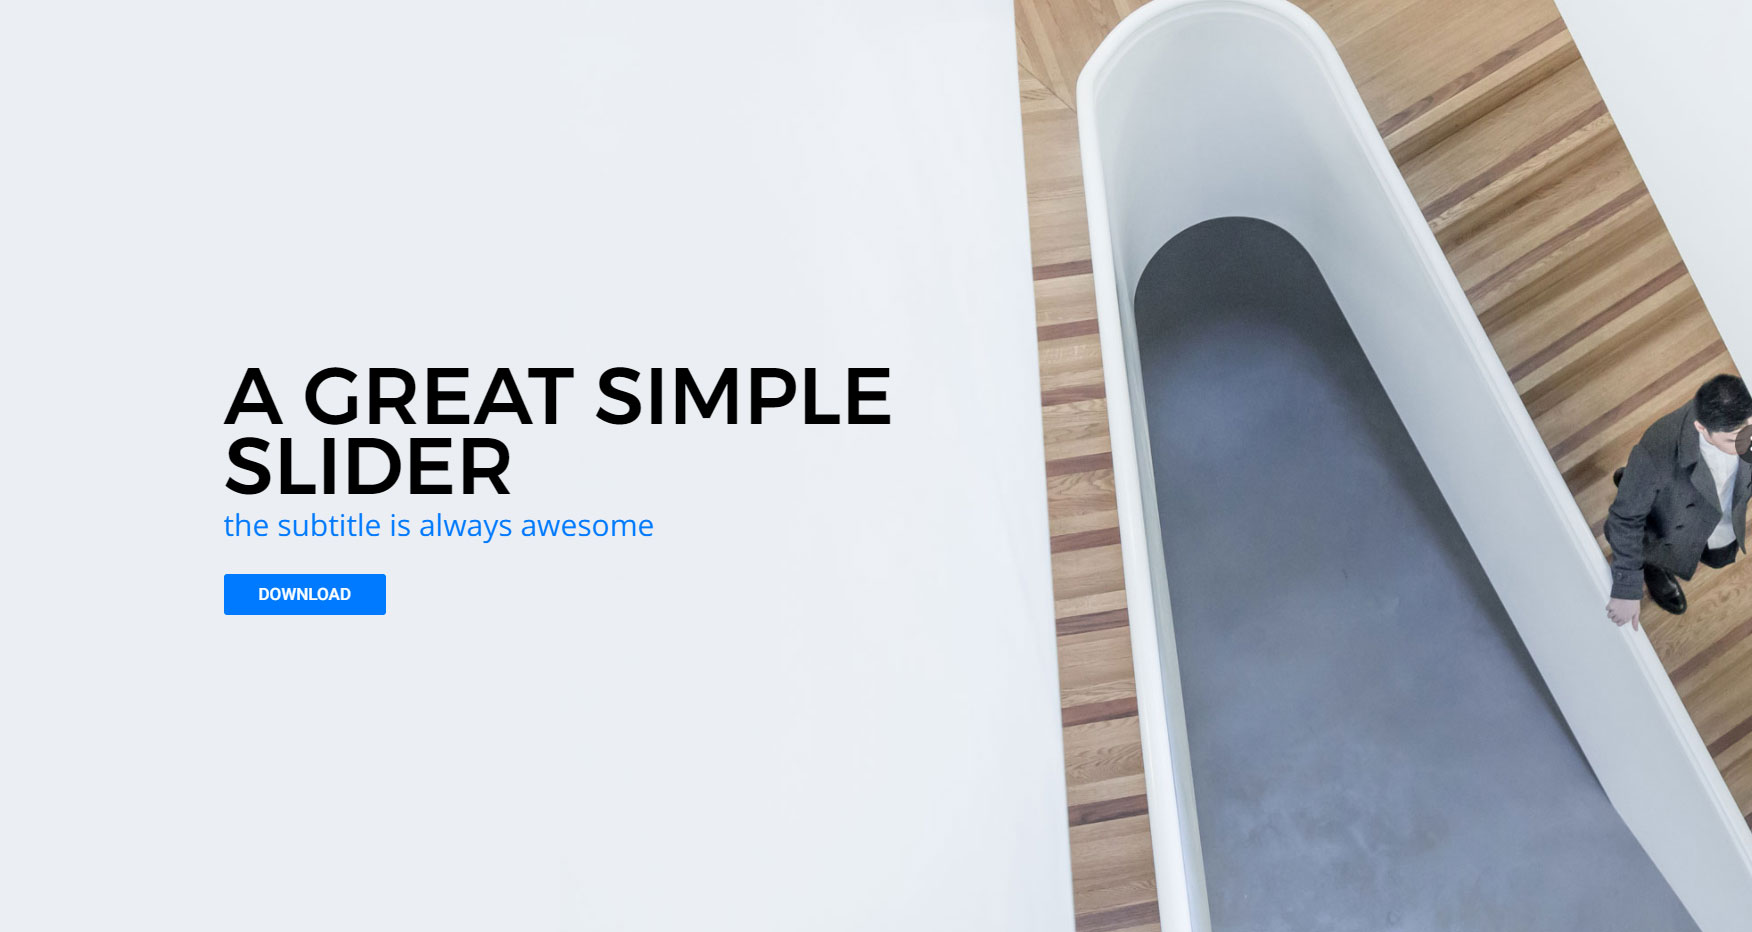
Now since this is a simple slider, first we have to upload the main background image. You should edit the size of the image you selected in my case, I’ve used 2220x1200px.
You just simply select the Main / Background Image and click the media library and choose your image.
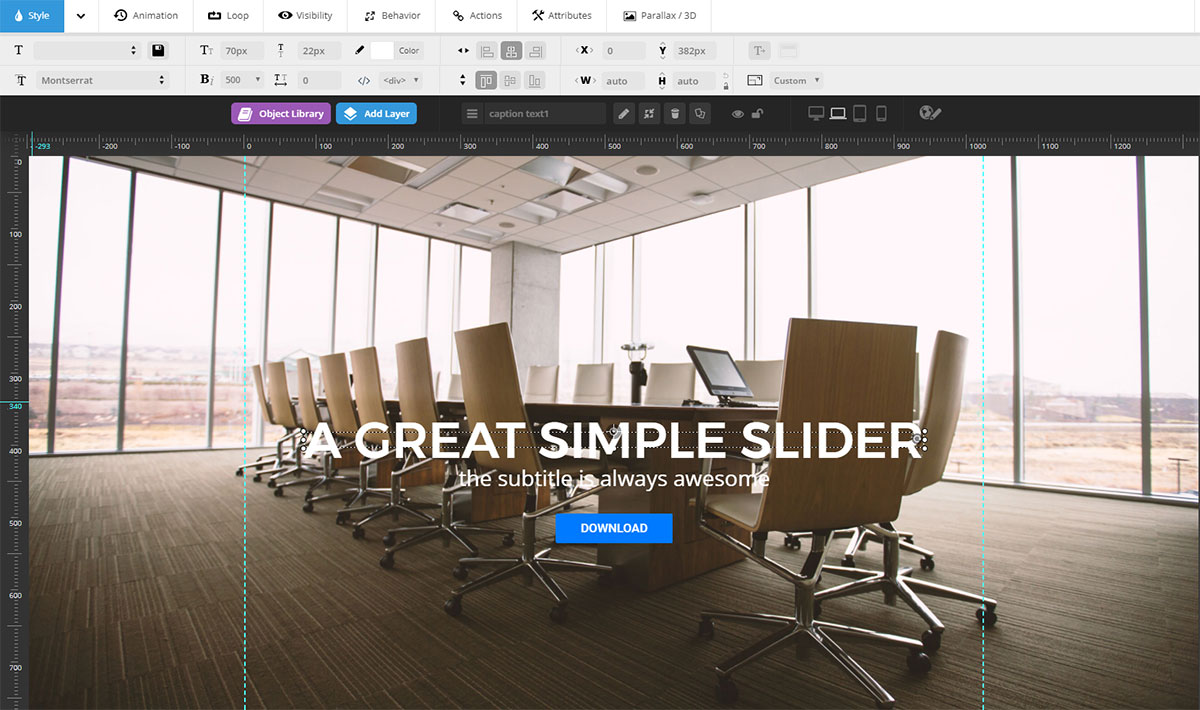
The background is set now let’s go ahead and insert the text. Select Add Layer and choose the Text/HTML layer type. Align it horizontally, adjust the size and repeat the process for the subtitle.
The very last thing is the call to action button. Revolution Slider has few premade buttons which you can add. Just go to Add Layer and select the button you want. We have placed the text a bit lower since we are making a full-screen slider and we have to take the menu into consideration.
Customizing The Mobile View
Once we have the basic slider set, we can continue to adapt all the mobile views. Before we do that, be sure to check the Custom Grid Size values. Navigate back to the Slider Settings, otherwise, it will adapt automatically which usually does not perform in the best way.
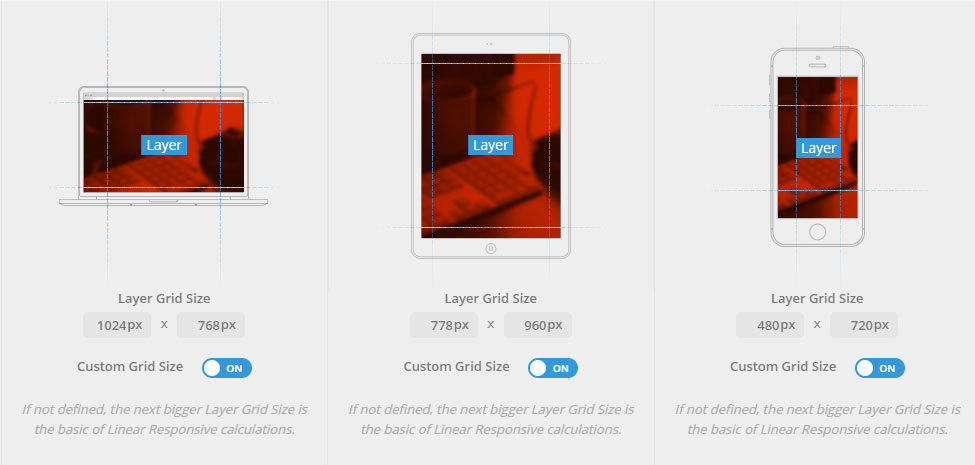
In this step, you can also adapt on which mobile view sizes the slider switches.
Creating More Slides
The best way to create more sliders is to duplicate the current one and replace the images and content.
In the last slide, we used a bit different image which we adapted in Photoshop. You can make the slider a bit more interesting.
Do not forget to activate the navigation (arrows), in the slider settings on the right side under navigation enable Arrows and select your style.
The Animations
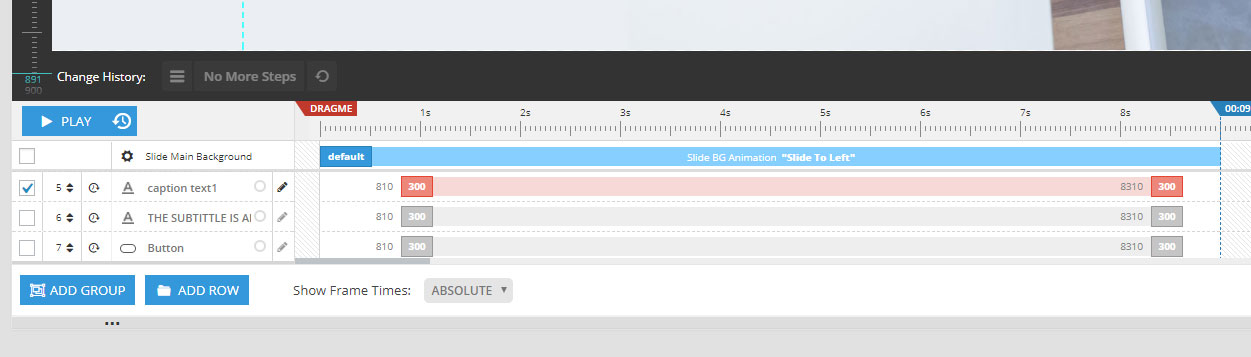
First, we have to set the Slide Animations. Revolution Slider offers an impressive library of animations which you can set in Slide Animations. For this demo, we used Slide To Left animation. Don’t forget to set it on all slides.

Now we can set layer animations. We used the fade in and fade out animation. You can set it by selecting the layer and selecting the in and out setting under Animation tab.
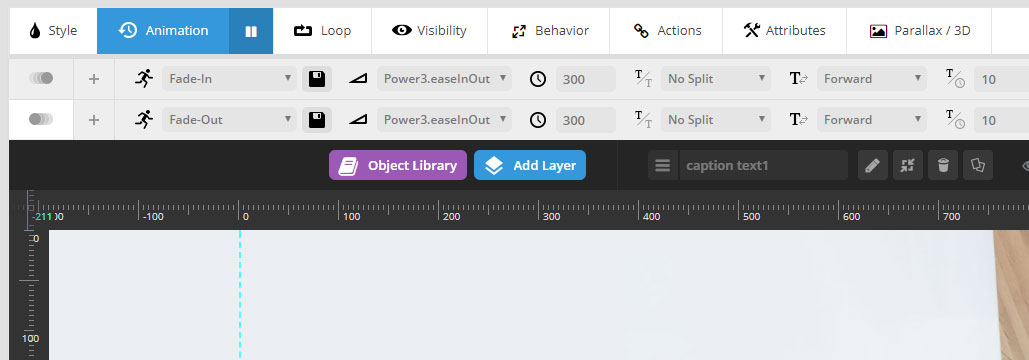
The last thing you have to do is to set the duration and delays of animations, which is really simple, just drag the timeline sliders to desired durations.
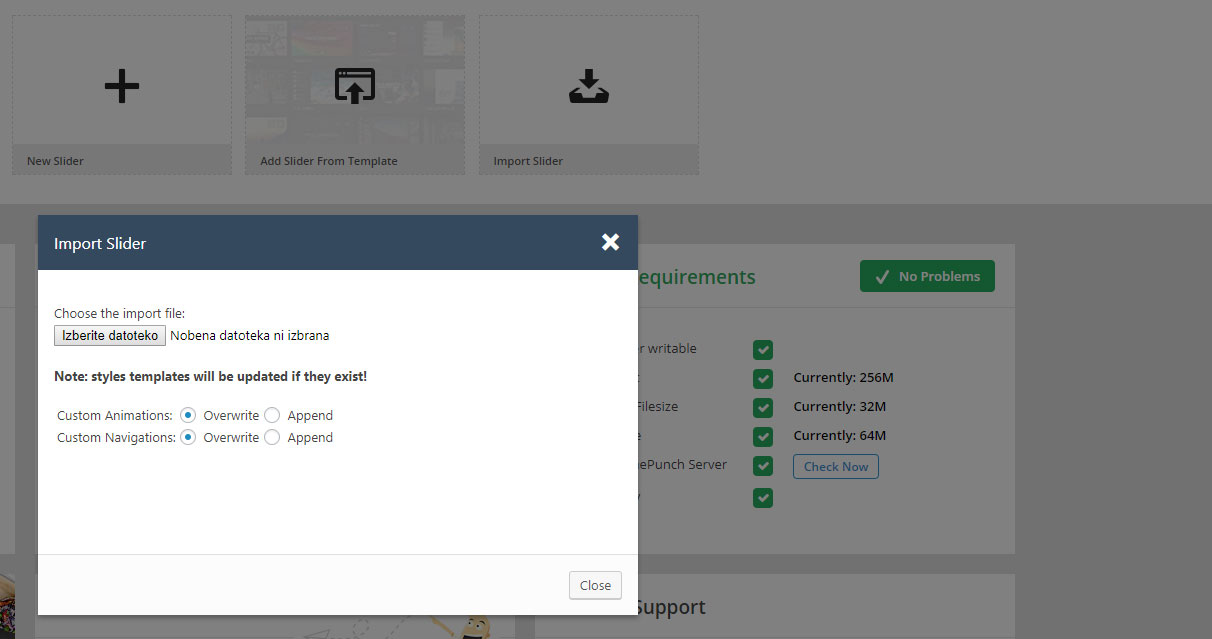
Exporting And Importing Your Slider
If you are building this slider directly on your website, you can go ahead and skip this section, if you are importing our demo slider you can go ahead and import the zip file.
The Conclusion
Revolution Slider is an amazing tool for creating rich sliders without any coding skills. And in cooperation with our themes, it works great! All our importable demos of the premium WordPress themes have demo sliders included and are imported with your selected demos.
If you own a stand-alone license you can also import the Revolutions Slider slides huge library of premade sliders. If you run into any issues, our awesome support is always few clicks away for owners of our products.